iriscope iridology

iriscope iridology

iriscope iridology

comentários sobre iriscópio
What is 12MP iriscope iridology?
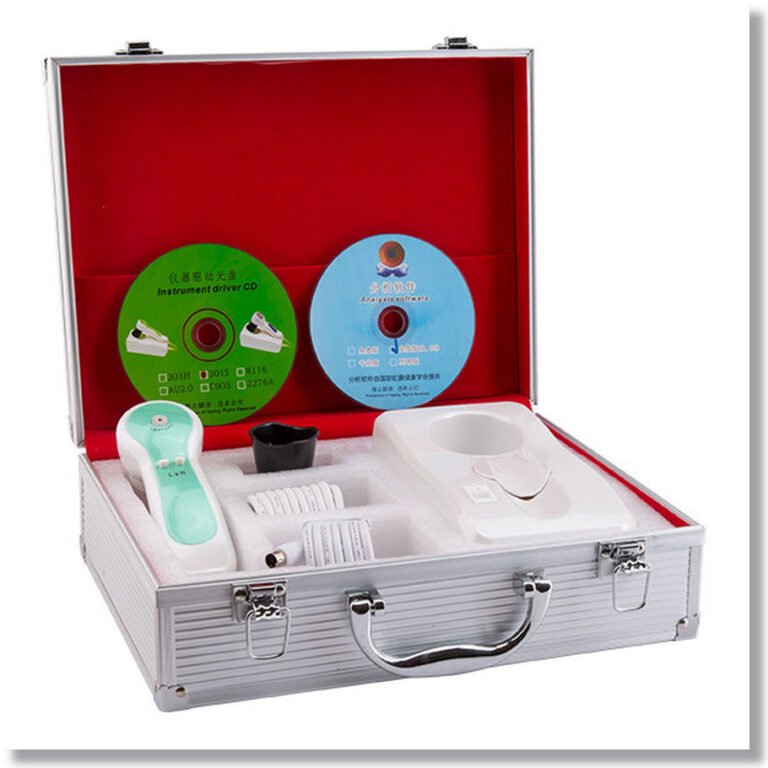
Acessórios:
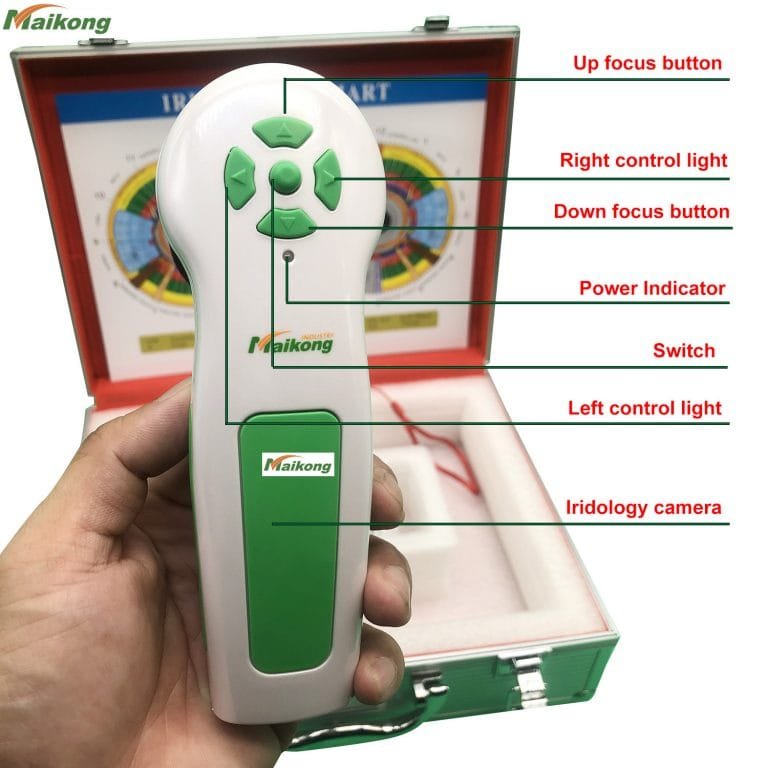
1. Handset x1pc
2. 30x lente íris x1pc
3. CAIXA PU DE CALARO X1PC
5. 1,5 metro Linha USB x1pc
6. Tampa de proteção contra lentes x1pc
Pacote:
* Gráfico de iridologia x1pc
* Instruções & Garantia x1pc
* CD (Driver e Pro Analysis Software) x1pc
Qual é o principal benefício da foto iridologia?
Não apenas traz pistas para sua análise de iridologia, mas ajuda a criar uma melhor conexão com seu paciente. O paciente, que é naturalmente curioso, está ansioso para ver sua própria íris. Com algumas explicações simples, elas podem obter uma compreensão básica de sua análise. A conexão com o seu paciente se fortalece e a compreensão do processo melhora.
iriscope iridology
* Sistema de análise de íris: tecnologia internacional, funções exclusivas.
* O sistema de análise IRIS é uma ferramenta medicinal que verifica as condições do corpo e impede que as doenças ocorram.
* Trazemos a tecnologia avançada de análise de íris da Alemanha para levar as pessoas a descobrir fontes de doença e cuidar da saúde e do espírito do corpo de qualquer maneira.
* O instrumento pode mostrar as condições do corpo dos clientes e sugerir os clientes os alimentos saudáveis adequados e os planos de cuidar de seus corpos.
Cura com iridologia:
A íris perfeita nunca foi vista e todos os indivíduos exibem algum grau de fraqueza do tecido, seja adquirido e desenvolvido a partir de hábitos e meio ambiente questionáveis, ou a partir da composição genética dos pais.
A cura vem da palavra raiz, que significa todo. A saúde e a Santa!
A cura vem de cuidar de todas as áreas de todo o nosso eu, ser mente, corpo e espírito.
Na minha opinião, quando você se livra do que o corpo não pode usar e dar o que precisa, o corpo fará o resto. O corpo é um espécime incrível maravilhoso. Todos os dias respira por si só, o coração bombeia por si só, se você se cortar ou quebrar um osso, eles se curam sozinhos. Você nunca precisa dizer ao seu corpo o que fazer automaticamente. Nossa responsabilidade é fornecer os elementos para o corpo. E você é o único que pode fazer isso.
12MP iriscope iridology Specifications
1. Alta resolução, imagens reais de 2 MagePixel
2. Fácil operação sem instalação do motorista
3. Pacote de couro de luxo
12MP iriscope iridology Instruction:
* Aparência agradável e design inovador
* Iluminador LED em torno da lente
* Lente importada com camada banhada
* 8.1 Mega pixels de alta resolução sensor CCD
* Processador de imagem DSP especial, estabilizador de imagem óptica
* Botão de captura única e captura de pausa digital.
* Foco ajustável para fornecer uma imagem clara.
* Equilíbrio de branco automático e ajuste de contraste, filtro de temperatura de cor
* Função de comparação de imagem dupla
* Modo de captura 3D-negativo
* Compatível com lente de íris, lente de cabelo.
* Forneça imagens claras e precisas.
* Fácil de operar.

iriscope iridology

iriscope iridology
How Choosing an iriscope iridology
Essential elements to look for in iriscope iridologys
Our cold lighting fibre optic system minimizes client irritation and gives precise daylight illumination for optimum exposure and true colour every time. It includes variable intensity adjustment to enable even the darkest eyes to display every detail with no loss of contrast! In addition, our lights avoid the pupils to avoid putting artifacts in this vital assessment area.
Easy operatation. Get perfect focus with ease.
One of the most important features to consider is the lighting. Our fixed lighting system ensures easy comparative analysis. Side lighting option included.
Our designer has had more than 30 years clinical experience as an ND and Iridologist bringing with him a keen understanding of what professional Iridologists need.
We only use high quality current model cameras and professional grade materials. Most of our camera systems include state of the art analysis software in the price.
All of our cameras meet iridology photographic criteria. In fact, we lead the way in iris photography!
How To Take Your Iris Photos by iridology camera
How To Take Your Iris Photos by iridology iriscope iridology
To take the best photos for your reading, set your iriscope iridology to MACRO and try, if possible, to use natural, daytime indoor light with a flash. Set the size of the photo for a higher resolution, with a minimum of 2.5M (2208 x 1248). 4.5M (2784 x 1568) is best.
Step 1: Taking Your Iris Photos with a Digital iriscope iridology
Set iriscope iridology to Macro Setting.
Increase Resolution to 4.5M (2784 x 1568).
Ligue o flash.
Use a luz do dia interno.
Fique de lado de qualquer janela (de frente para a janela causará brilho).
Have someone else hold the iriscope iridology or use a tripod and timer.
Segure as pálpebras superior e inferior abertas para tornar a íris inteira visível.
Tire uma foto de cada íris de cada vez.
Keep the eye close to the iriscope iridology. On Macro Setting, you can be 4-5 inches from the lens.
Etapa 2: Verificando suas fotos para iluminação e clareza
Check the photo on the Viewfinder of your iriscope iridology. Use the zoom feature to see the iris.
Certifique -se de que a íris esteja clara; Caso contrário, tente novamente.
Certifique -se de que não há olho vermelho; Caso contrário, ligue a 'Red Eye Reduction' e tente novamente.
Certifique -se de que toda a íris esteja visível; Caso contrário, tente novamente.
Certifique -se de que não há brilho significativo na íris; Caso contrário, afaste -se um pouco do corpo de qualquer janela e tente novamente.
Etapa 3: Envie um e -mail para os resultados finais da foto da íris
Você pode cortar as fotos para que apenas o olho fique visível para reduzir o tamanho do arquivo.
Se isso for muito trabalho, basta enviar por e -mail a foto inteira.
Você pode enviar 3-5 fotos do olho esquerdo em um email.
Você pode enviar 3-5 fotos do olho direito em outro email.
Using a Digital iriscope iridology: Video Instructions on How to Take Iris Photos
Usando um iPhone: Instruções de vídeo sobre como tirar fotos da íris
Exemplos de envios inaceitáveis de fotos de íris
NÃO! Ambos os exemplos têm brilho significativo, tornando as partes da íris ilegível
No primeiro exemplo acima, a pessoa provavelmente estava de frente para uma janela, fazendo com que o brilho aparecesse na íris. A solução: afaste -se um pouco da janela e tente novamente.
No segundo exemplo, é provável que essa foto tenha sido tirada à noite ou em uma sala sem janelas e apenas luz aérea. Devido à luz mais escura da sala, a luz está refratando a íris, causando brilho significativo e deixando a foto embaçada. A solução: tire a foto à luz do dia interno sem iluminação aérea. A iluminação lateral geralmente é boa.
Uma pequena quantidade de brilho na pupila (o ponto preto no centro da íris) é bom.
NO! Not looking directly at the iriscope iridology lens creates a distorted image of the iris
In the above 2 examples, the individuals are most likely trying to take the photos themselves so they are inadvertently looking at the iriscope iridology while trying to take the photo.
The solution: Have someone else hold the iriscope iridology steady for you or use a tripod with a timer.
NÃO! Nessas fotos, a parte superior e/ou a parte inferior da íris são cobertas
Ao tirar suas fotografias, verifique se toda a parte da cor do olho é visível, especialmente a parte superior e inferior. Se você tende a ter olhos "caídos", apenas puxe a pele gentilmente dos olhos usando o polegar e o dedo indicador.
Exemplos de envios de fotos aceitáveis da íris
SIM!! Fotos perfeitas - Nota Flash dentro da pupila e íris completa visível
SIM!! Embora não esteja perfeitamente clara, esses 2 exemplos ainda são legíveis
SIM!! Fotos muito boas - íris completas visíveis, claras e fáceis de ler para iridologia
SIM!! Fotos perfeitas - Nota Flash dentro da pupila e íris completa visível
SIM!! Fotos perfeitas - Nota Flash dentro da pupila e íris completa visível
Saiba o que esperar da sua análise de iridologia na iridologia explicada.
Encontre respostas para perguntas adicionais sobre iridologia e como ela funciona na Iridology - as perguntas frequentes.
Comece agora! Agende sua consulta on -line no livro sua consulta de iridologia.
A iridologia não pode diagnosticar doença específica.

comentários sobre iriscópio

software de iriscópio

iriscope iridology

comentários sobre iriscópio
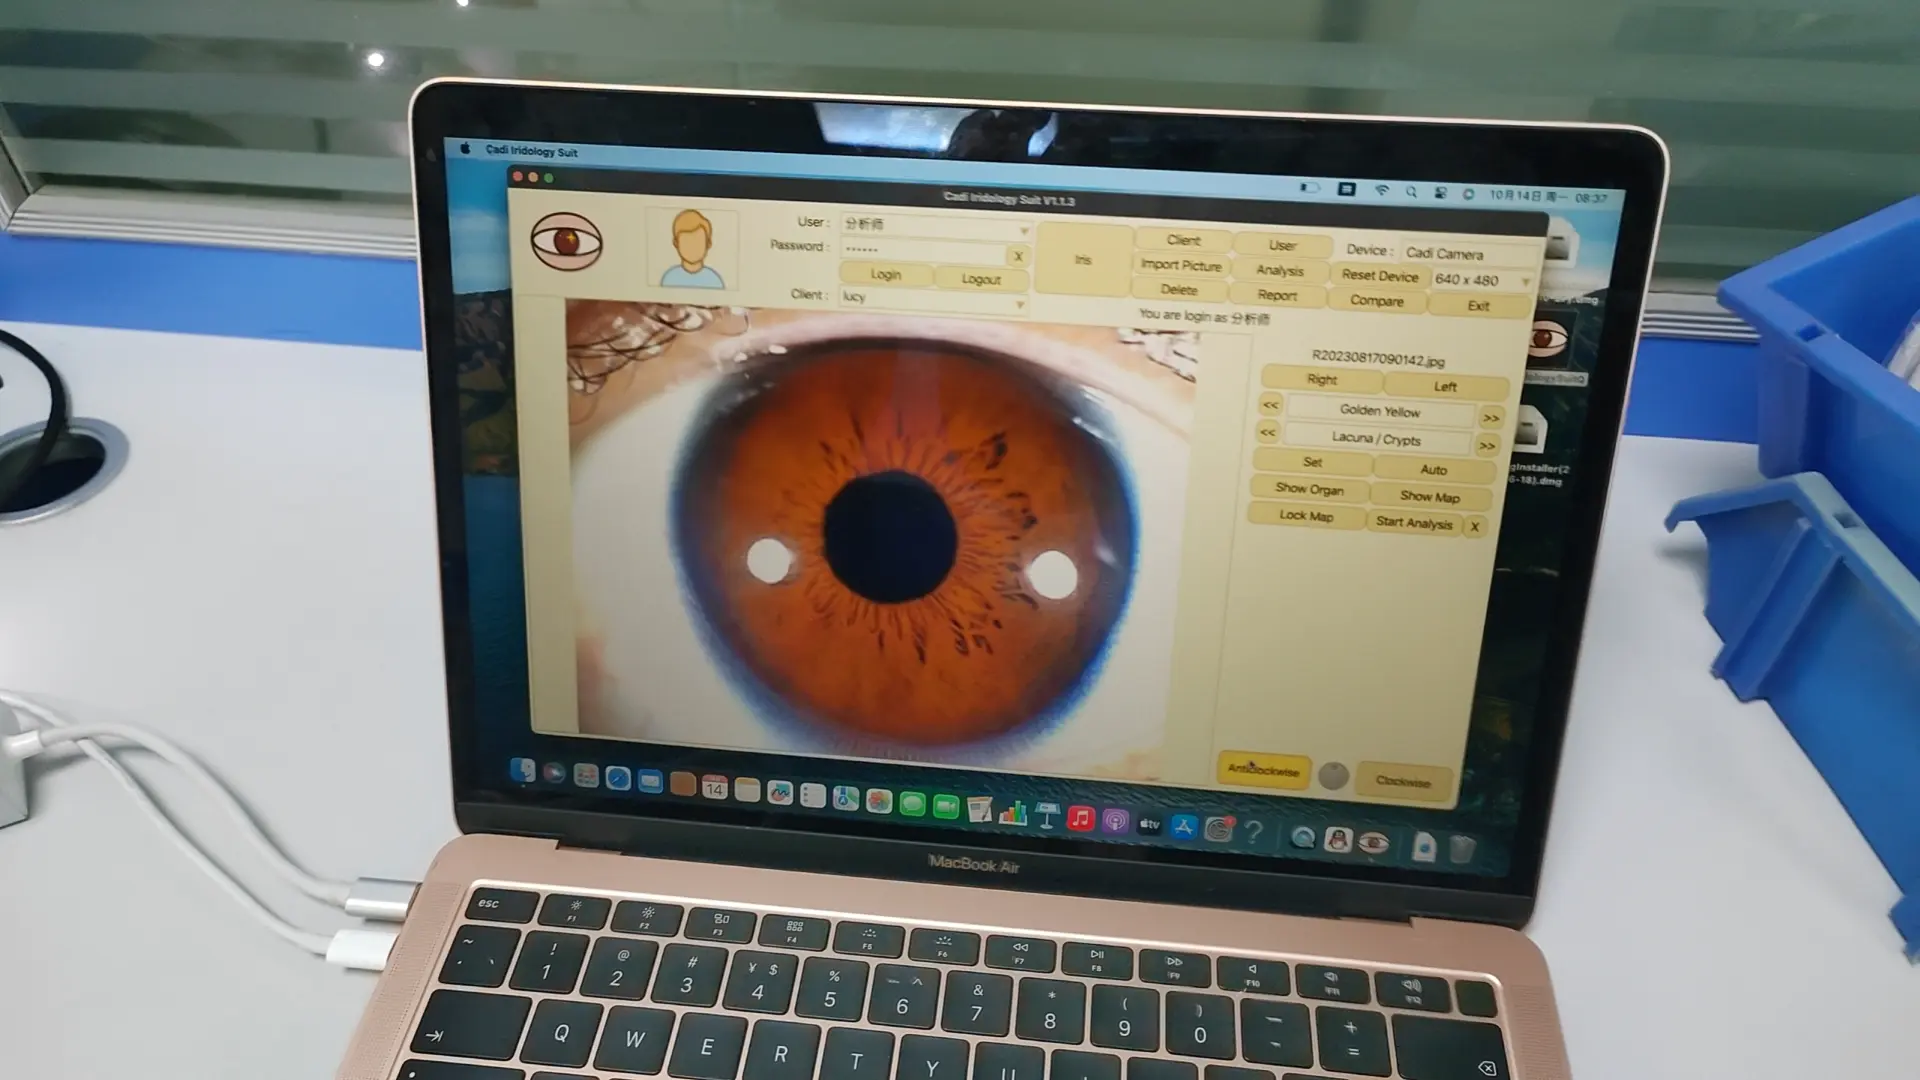
Como usar o software Iridologia Auto -Iridologia da versão em inglês Cadi CV CV?
1) Desktop aberto o “Versão em inglês do sistema de análise avançada CadiCV”
2) Use selecionar “usuário”, senha: 111111 e clique em: “Conecte-se”
3) Clique “ferramenta de cliente”, insira as informações do seu cliente. Se ok, clique “adicionar”,e
Clieck”fechar”
4) Clique “Capture o olho direito”.–clique “capturar”, Repetição do olho esquerdo Última etapa.
5) Selecione a foto dos olhos (foto do olho direito / foto do olho esquerdo)
6) Clique “análise”
7) Clique “Defina o parâmetro” botão.
1º. Coloque as setas do mouse no centro da pupila, clique na chave esquerda do mouse,
2º. Remova as setas da borda do mouse da pupila, clique na tecla esquerda do mouse,
3rd.Remove as setas do mouse entre Iris e Sclera e clique em Chave esquerda do mouse.
E clique no botão "Definir parâmetro".
8) Clique “Análise da íris” Botão e clique em "Mostrar o botão de órgão".
Em seguida, escolha que parte dos olhos você deseja analisar, veja sua cor e
forma, finalmente clique em sua cor e forma, como seguindo "marrom, caroço",
Remova as flechas do mouse para a sua peça de escolha correta, finalmente, você pode ver o seguinte
A imagem do resultado da análise, se você escolher “cor ou forma” está errado, não é resultado da parte
Nota: Quando você puder ler o resultado da análise a cada vez, clique em "Adicionar ao relatório" do olho direito, armazenar
o resultado da análise. Obviamente, você pode continuar em qualquer parte do olho direito, repita para escolher a cor e
forma.
Quando você terminar a análise do olho direito, clique em "Análise" novamente e escolha "esquerda" de olho, para
Repita as maneiras de operação acima.
9). Ao terminar todas as análises de peças, clique em "Análise" novamente e clique em "Salvar", para armazenar um
Resultado completo da análise da íris do cliente.
10) Clique no botão “Relatório do cliente” do botão e clique em seu nome de substituição,

iriscópio usb

Iriscope portátil

iriscópio usb

iriscópio usb


